Ovonic, founded in 2017, aims to build a direct to customer online battery brand and to create an easier solution for newcomers to break into the RC world. Ovonic prides itself with the best prices and multi-choice of batteries to power up all forms of RC’s from land to air.
Company Mission
Our mission is to bring real fun to this community without the high price tag. With our high discharge, high quality, and great prices, our batteries will allow every hobbyist to enjoy the incredible power, speed, and pleasure while playing with their friends or even training alone.
Committed to Solving Issues
Not only are we committed to the high quality of our batteries but we also prioritize our RC related issues by keeping knit bonds with RC hobbyists. We take serious consideration of the ever-changing needs of our customers and constantly strive to improve our batteries for our community.
Team Ovonic
We love RC and everyone and anyone who loves RC. We built an amazing team – Team Ovonic. Who are our members? David Graves, Jeff Bates, Luiz Rena Meireles – fpv, Mako Reactra, and Justin Kent Furnis! They love the RC community and are constantly challenge themselves to keep improving and to push the boundaries of FPV further. We will announce more pilots and drivers in the coming days. Now, let’s tackle different types of challenges ahead of us together, so that we may grow and improves a team!
Overview
As an emerging battery brand, Ovonic has been lucky enough to be recognized by RC hobbyists that we are a trustworthy and high-quality brand. All we ask is people to give our batteries a try, and most people are impressed with the high performance and the amazing price point.
MANUFACTURER: E-flite DISTRIBUTOR: Horizon Hobby TYPE: STOL Specialist FOR: Any pilots with limited experience
MINIMUM FLYING AREA: Ball Field PRICE: $249.99 (For the BNF as tested)
NEEDED TO COMPLETE:
The only things needed to get the BNF version of the Timber into the air are a 5+ channel DSMX/DSM2 radio, a 3S 2200mAh LiPo and a compatible charger. The PNP offering of the Timber from Horizon requires a radio, receiver, LiPo and charger. AUTHOR’S OPINION:
At the time of this writing, I had the Timber out of the box and in the air for roughly four weeks. Even my new limited role as “digital only flight jockey”, I still manage to get get out to the field every weekend with no less than 6 models in tow. The one model that has made the trek every weekend, since I cracked that packing tape off the box, is the Timber. Whether I want to cut loose with some wild scale aerobatics or touch and go til the cows come home, it is now my favorite sport model. The two-piece wing makes it easy to transport and factory labeled wire harnesses make field setup a breeze. The best part though, are the STOL capabilities of the Timber and its ability to take on punishing field conditions that would send other aircraft (and their gear) scrambling.
Low and slow is what the Timber does best.
PROS
Floats and NAV lights included
Amazing STOL performance
The BNF version includes SAFE for training pilots
10+ minute flight times
CONS
Foam finish could be better
Belly mounted battery … booooooo
Upside down, NAV lights blazin’ and all.
SPECS
WINGSPAN: 61 in. (1555mm) WING AREA: 559.5 sq. in. (3610 sq. cm.) WEIGHT: 50.3 oz. (1400g) WING LOADING: 12.95 oz./sq. ft. CUBE LOADING: 6.6 LENGTH: 40.9 in. (1040mm) SERVOS: (6) Spektrum A330
MOTOR: E-flite 10 Ultimate 2
ESC: E-flite 40 amp PROPELLER: 12 x 4
KEY FEATURES
The light wing loading, combined with the slotted flaps on the Timber gives it awesome STOL capabilities. I took my first few flights without adding the slats to the leading edge because I don’t think it needs them. Drop the flaps to half, punch the throttle and blip the elevator up for a takeoff that chews up all of 18-24 inches … and that’s without a headwind!
Bush planes are known for their ability to deal with adverse conditions, one of which being night flights. Make your dusk sortie with the sun just above the horizon and rest assured, you’ll bring the Timber back, straight on the numbers, with the bright wingtip, belly and top lights.
What STOL sport model would be complete without a set of floats, right? Horizon has long been producing such models in a wide variety of scales, but the floats were always an optional purchase. Not so with the Timber as it comes with them and they feature dual rudders!
The newest generation of the flight controllers, AR636A as found in the Timber, allows the user to bind the aircraft with AS3X and SAFE or with just AS3X. That’s a big plus in my book, as experienced pilots might get turned off by the limited throws as allowed by the SAFE system.
The bush-style wheels on the Timber make pretty much any surface suitable for takeoff and landing. To add to the realism and ability, the gear mounts reside on hinge pins and each strut is tied to the other via a sprung x-brace. That means even if you bounce it in or encounter a small rut, the Timber will stay on point. I’ve heard of folks breaking the springs at the 90-degree bend within the retainer, but I have yet to encounter any issues, even after dozens of touch and go.
The two-piece wing of the Timber makes it super easy to store and transport, even with three leads dangling out of each root (LED’s, Flaps, Ailerons). E-flite labels each wire, so field installation is a breeze. Additionally, both the flaps and ailerons are driven by concealed pushrods, giving the model a nice and clean scale appearance.
The spring loaded gear can take quite the rough landing and the Tundra tires make nearly any field your tarmac.
INTRODUCTION
Horizon, of late, has been on a tear with the foam releases and while they normally focus on sport aerobats and warbirds, the Timber takes things in an entirely different direction … and that’s a good thing. This STOL gem is perfect for lazy afternoon flights, even from the smallest of fields or body of water. The price is a bit high for a park-sized high wing BNF, but the inclusion of both NAV lights, floats and flaps make it easy to swallow. The performance envelope is also quite wide, especially if you make a few choice modifications (to the BNF model). Let’s take a closer look …
The model arrives boxed up, nice and secure. However, once I pulled the fuse out of its enclosure, I was shocked to see the belly light dangling from its intended perch by about 6 inches of wire. A quick jump to the Horizon website revealed that I wasn’t the first to experience the distended belly lightly. I dabbed a bit of Fix N’ Flex from Deluxe Materials on the light mount and stuffed it back into place and was good as new. My only two other complaints are: 1) One of my four landing gear mount screws wouldn’t sink in all the way, obviously due to the mount not being tapped deep enough in that hole. I simply snagged a slightly smaller screw from my pit box and was good to go. 2) The entire model is attractive, yet the molding and finish of many of the surfaces leave much to be desired. After my first few flights, I spent a good hour or so slicing rough flashing bits off the tail section alone. The wing joiner could be a bit snugger as well. These three qualms I alluded to in no way affect the performance of the Timber, which is amazing. The build is fairly simple and could take most modelers far less than an hour to complete, so make sure you get that flight pack on charge before breaking the box open.
PRO TIPS:
Try the Timber out for yourself without the slats. You could always add them later if desired, but the there is a bit of yanking and gluing involved if you want to install or remove them. I found the STOL capabilities to be astounding, even without the slats. Plus, it’s a heck of a lot easier to transport without those small strips of foam on the wing halves.
Shove that battery all the way forward. I found that even with the wheels on, the Timber seems to be a bit heavy in the tail. With the battery crammed all the way forward, up against the bulkhead, the model balanced out perfectly. I did have to add about a quarter ounce of weight to the inside of the cowl when I had the floats on it, but aside from that, the model flies amazing well from both land or sea.
If you are an experienced pilot who loves to bust some aerobatics, but also putter around the patch at a lazy pace in true STOL fashion, get the PNP model and add a receiver without AS3X. The stability system works in the background to keep the model smooth and on track, but it also somewhat limits the amount of travel you can dial into the control surfaces. If you want to explore the full spectrum of flight possibilities with the Timber, set some expo and nothing else and let it rip.
Upon step in a hurry and about to liftoff.
ASSEMBLY
The final build begins by installing the landing gear … or floats. I used my StandBox cradle to keep the Timber on its back, with the top of the rudder more than clear of the table top. Once the four screws are secure for the main gear, you can join the two strut assemblies with the small plastic clamp. I found it easiest to roll the model over at a 45-degree list to have the topside strut leaning towards the bottom one, making for an easy install sans an extra set of hands.
Once the gear or floats are on, you install the horizontal stabilizer and elevators. The two tail halves ride on a small carbon spar, are self-aligning and interlock once seated. No more tape on the tail feathers … yay! After popping the quick clevis off the elevator pushrod, place it in whichever hole you like (inner for more throw, outer for less) and lock it back down with a twist.
With the tail all situated, the main wing is all that’s left to finish the build. I found it easiest to assemble the wing and hold it in place with the bracket and screws, placing it on the fuse just aft of the opening on top and joined up the wires. The LED’s in both the wings and the receiver Y-harness are labeled either L1 or L2, but the aileron and flap leads are only labeled on the wing sides. Common sense (with Spektrum receivers) dictates that the Y-harness on channel 5 is for the flaps while the other is for aileron. Once all connected, bind the model to your transmitter using one of the prescribed methods in the manual (1: bind plug in, power model on, remove plug and bind model for AS3X and SAFE or 2: place bind plug, power model on, bind model, then remove plug for AS3X only). If using SAFE, you must program whichever switch you want to activate the different flight modes. Once bound, power the transmitter on, then the model back on. Once initialized, pull both sticks down and in and hold them there while toggling the desired switch back and forth at least five times. After that, it’s as simple as stuffing the bundle back down into the fuse while placing the wing. It would be nice if there was some sort of shroud over the elevator and rudder servos to prevent any wires interfering with them, but shoving the veritable bird’s nest of wires as far forward when attaching the wing.
IN THE AIR
I performed my maiden flight with the model bound in AS3X only mode and the factory recommended flap/elevator mixing dialed into my Spektrum DX6. To hit the proper CG point, I had to stuff the E-flite 2200mAh 3S all the way forward, right up against the ESC leads. After a range check and confirmation of proper deflection, I taxied the Timber out onto the centerline of the runway holding a fair amount of up elevator and making sure not to go too fast as the massive lift provided by the wing and flaps at mid would lift the model in a heartbeat. Once in position, I goosed the throttle, fed in a bit of up elevator (or so I thought it was just a bit) and the Timber leaped from the grass, consuming all of 18 inches of the runway, and assumed a straight nose up attitude.
Thankfully, I was on point that day and managed the level the model off with the elevator while stowing the flaps, powering up to gain some altitude to check the trims. All I needed was a click of left aileron and the Timber was floating hands-free at just around the ¼ throttle. I flew a few circuits around the field to get a feel for the model and was pleasantly surprised. The elevator has much authority and the manually specified rates and expo seemed spot-on. The ailerons make for some mighty fine scale turns, but the Timber will need a bit of altitude if rolling with them alone. Things were a bit tighter when rolling if coordinating a bit of rudder throughout. Snaps looked great and were super easy to perform and the model feels just as planted while inverted as it does upright.
While still up a bit, I dropped the flaps to the mid position and, slowly (thanks to the recommended speed setting on the flap servos), the Timber lifted its nose. Rather than trimming the model on the elevator, I pulled the flaps back up and came around for my first approach … overshooting the numbers by about 100 feet! Even without the flaps deployed, the Timber will float for days. Before powering back up, I made note of how effective the ailerons and massive rudder remained, even at incredibly slow speeds. A quick touch and go and I made another circuit to line it up again. This time I killed the throttle while still on the downwind leg and then made a tight turn into the tarmac. This time, I still overshot the entry by a bit, but the Timber touched down just past me and rolled out ten feet or so.
I popped a fresh pack in and dialed the elevator to flap mixing a little heavier. The manual states to use 9% elevator at mid flap and 13% at full deflection. I increased those amounts to 13% and 17% respectively and headed back out. This time, I set my timer for five minutes, flipped the flaps to mid and slowly rolled on the throttle without so much as a tug on the elevator. With just a touch of right rudder, the Timber performed a perfect scale takeoff, rolling for twenty or so feet before lifting the tail and slowly creeping skyward … and this was still with nary an input from my right hand! So, the new flap mixing was spot on. Retracting the flaps once more, I put the screws to the Timber to see what this new 10: Ultimate 2 motor was worth. The model has plenty of grunt and can get up and go with a quickness. Rolls become much more axial at speed (duh) and the adrenaline factor is cranked to 11. Knife edge is possible and easy to do at anything above 50% throttle on factory rates, though there is a bit of coupling towards the gear with those giant tires hanging down there.
Horizon and E-flite though of everything for this model. The inner front edge of each float has a splash fairing to keep the chop away from the fuse and cowl … and vital electronics withing them.
Low and slow and touch and go’s are where it’s at with the Timber. Drop the flaps all the way down to their maximum and putter the model in for a bounce or a roll without even needing to touch the elevator. With the Timber balanced and trimmed properly, I could simply chop the throttle, monitor the rudder and ailerons, let the mains settle, feed a little juice into it to keep the tail up and then throttle back up for another smooth liftoff. Likewise, Inverted low and slow passes are about as easy as they come. I’m no 3D master, but I was able to get the top of the rudder as close as six inches or less on some passes.
Subsequent flights were performed with the travel opened up to 130 on the elevator and ailerons. With more travel, the Timber will hover, but do nothing even close to an anti-torque roll. The 10 motor has plenty of rip for level flight and mediocre vertical, but limited bailout grunt, so keep the diligence up and on the sticks. I found the model always tended to lean towards flat inverted once the ailerons and elevator got mushy, so I would simply sacrifice a foot or two of height to pull out straight and inverted. With the increased travel, loops were as tight as I wanted them, from scale to extreme, with little rudder required to keep it straight.
On floats, the Timber is a joy to fly. Takeoff and landing are easier than stringing the dual rudders to the pull-pull horn at the base of the rudder. Each rudder is spring loaded, so you simply pull the line to tighten the spring until each rudder is straight, place the pin in the hole and tighten the set screw. The setup is a bit weird, but works incredibly well. Using the same trims and rates as I did while on land, I did have to add some weight to the nose to get it balanced, but I wasn’t at all worried about the miniscule gain. Inverted with floats isn’t something you’d normally see, but the Timber will hang on its floats all day, with only a slight rock being evident with the extra weight on the belly.
One the water, with a mild breeze, the Timber is a joy to taxi. Being sure to keep on the elevator, the dual rudders have awesome turning power, so you won’t be trekking to retrieve your model if the wind picks up and it weathervanes. Being cautious, yet deliberate on the tail sections and with the flaps at mid, I advanced the throttle and watched the Timber climb up on step in just a few feet, just like on land. I pushed it a little harder and watched the model climb out in glorious amphibious fashion. Handling in the air was much the same as with the wheels on it, only a bit slower with the rolls and loops. If you can believe it, hovering was actually easier for me with the floats on, though I still kept it up a bit. Touching down on floats is always a nerve racking experience for me, but just as with the maiden, I lined it up and basically let the model do the rest. With limited chop on the water, I kept the tips just above parallel at ¼ throttle and waited for contact. Once the water touched, it did grab just a hint so a slight jab of up elevator and easing slowly off the throttle once settled makes the Timber about as easy as any float plain to land. I un-puckered and took back off for another series of worry-free touch and go’s aqua style.
A few weeks after my maiden, I did get the opportunity to (re)bind the model in SAFE mode for a couple of quick flights with a novice pilot. I must say, the Timber is the perfect model for anyone with very limited flight experience. Basically, if you can keep from banging the sticks, you’ll be fine with SAFE and AS3X. The SAFE system does tame things a bit, but that’s exactly what training pilots need and want. Selecting a bailout switch is as easy as holding both sticks down and in while cycling said switch five times. I did re-bind the model once finished with the lesson to disable the SAFe and only employ AS3X, but I do plan on putting a regular receiver sans flight control capabilities in there in the near future.
THE LAST WORD
Ask anyone that knows me, read any of my previous articles, check the majority of pics on my Facebook page or just take my word for it; I am not a high-wing type of fella and when I ask folks to guess what my favorite new model is, they usually retort quick-like with an Edge 540 or some hot rod warbird. I toss them a flippant grin and then tell em’ it’s a bush plane … error, float plane … error, trainer … errr aerobat. The Timber really is all of those things and while the price begets a fit and finish that’s still a stone throw or two from what you actually get, it only takes a little tinkering to “scale off” the factory cut edges and tidy up any other issues (ie, the umbilical cord in my model). The Horizon support after the sale is top notch, should you encounter any debilitating flaws, and parts sourcing for wear and tear as well as crash damage are easy to get. Best of all, you can putter around for 10+ minute on a freakin’ 2000mAh 3S pack!
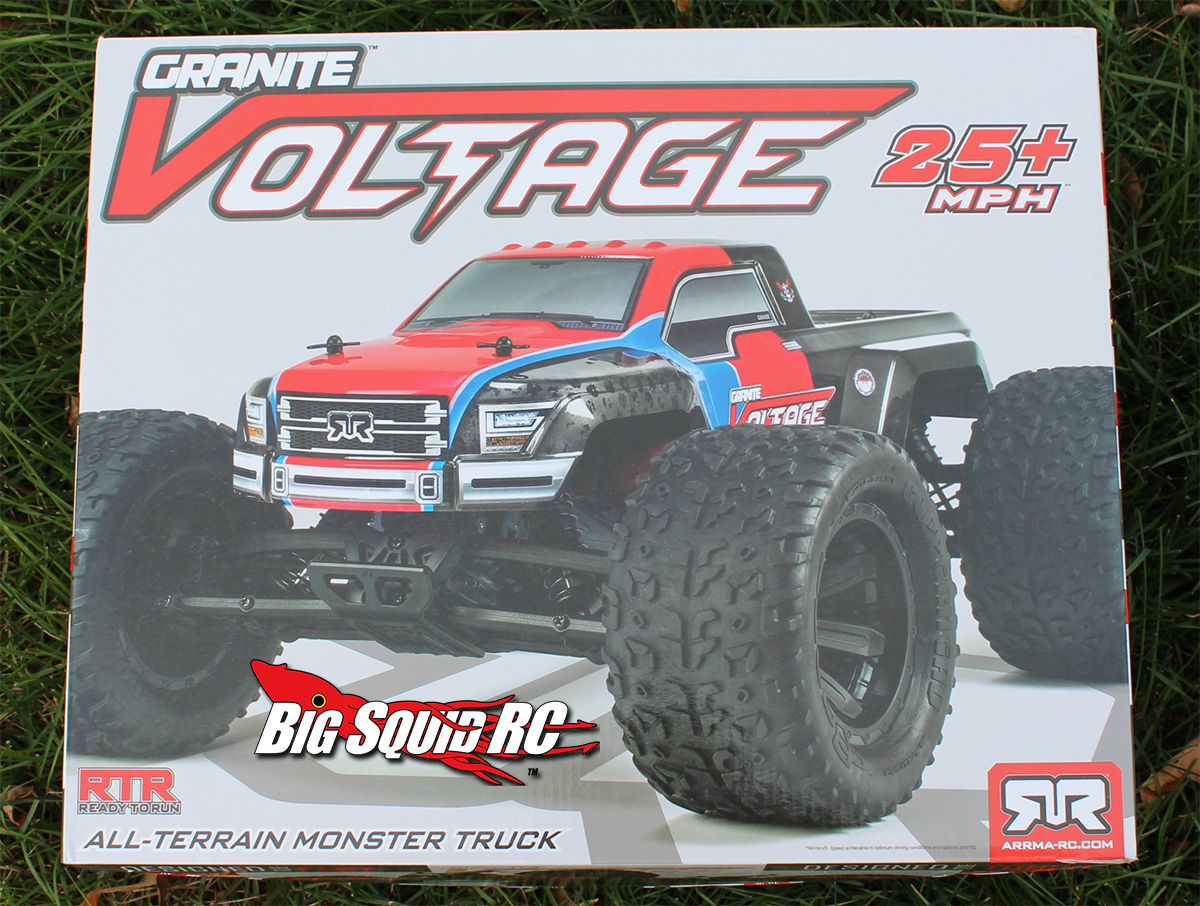
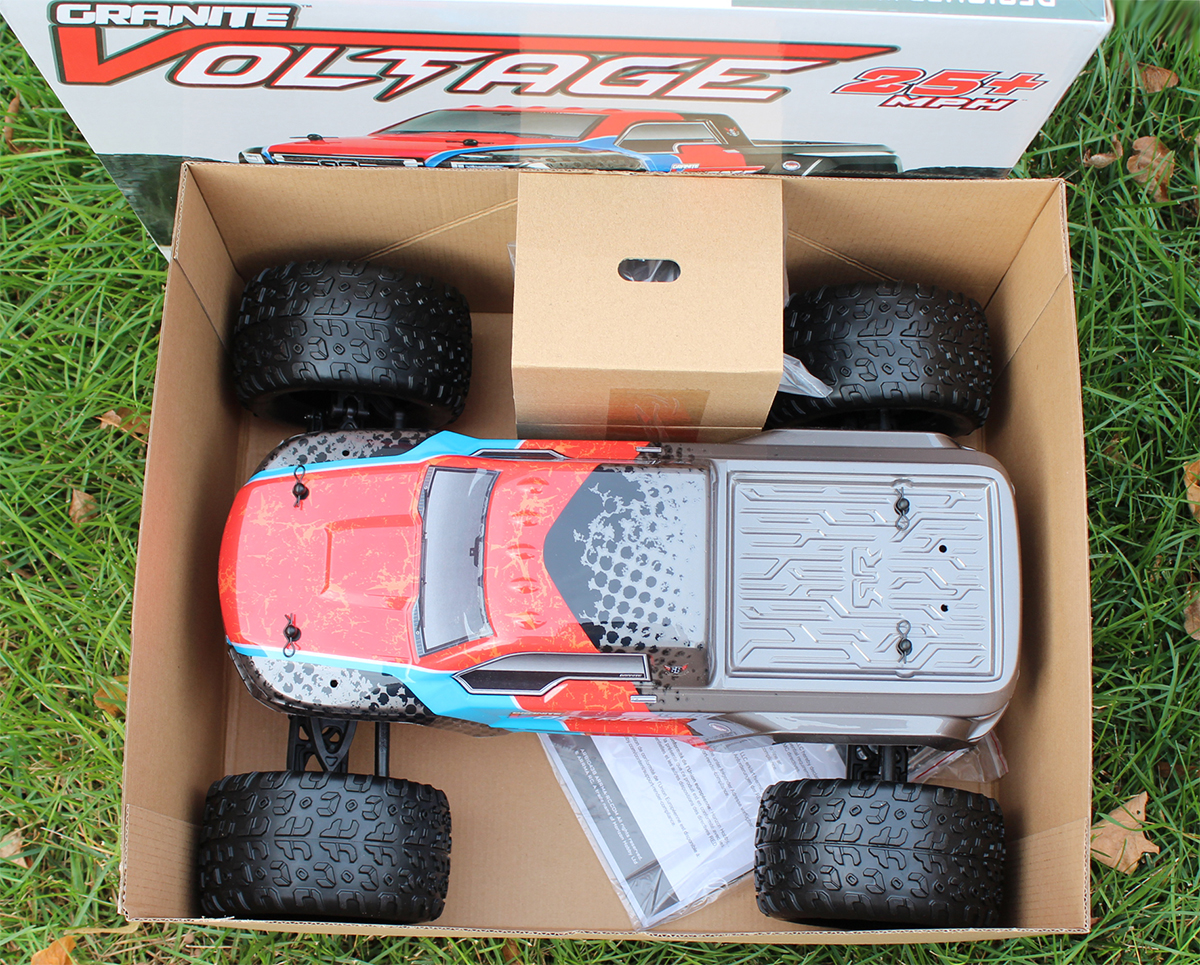
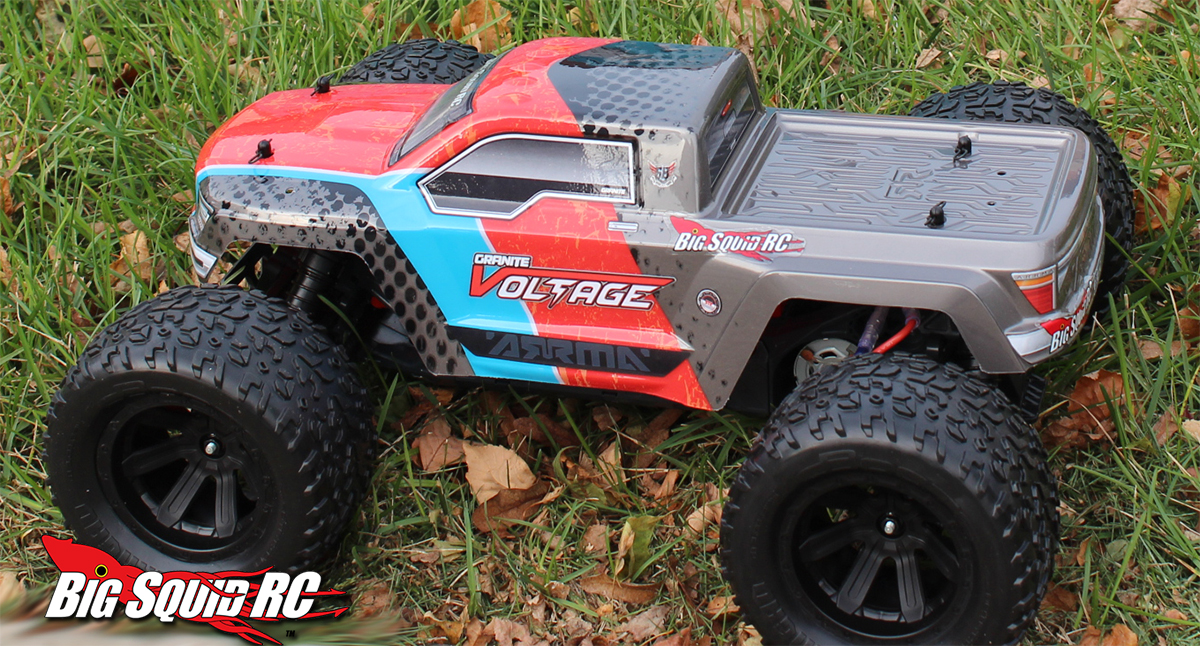
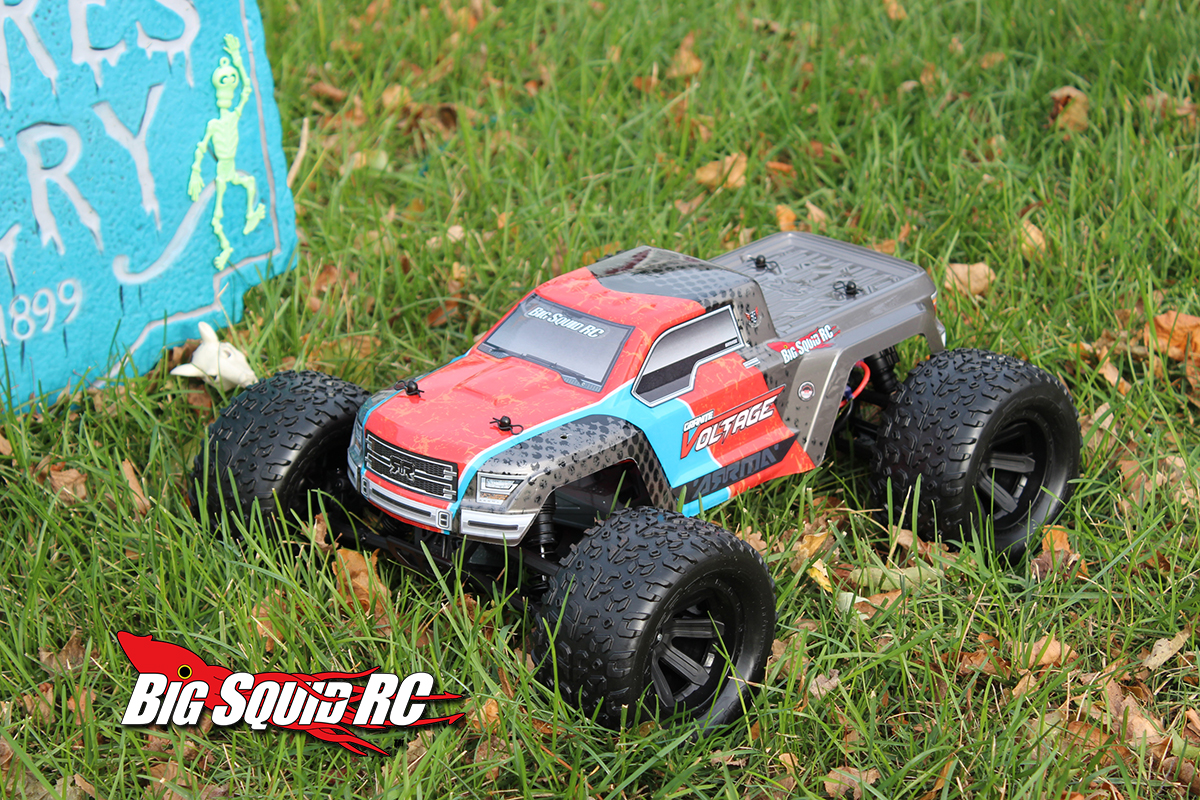
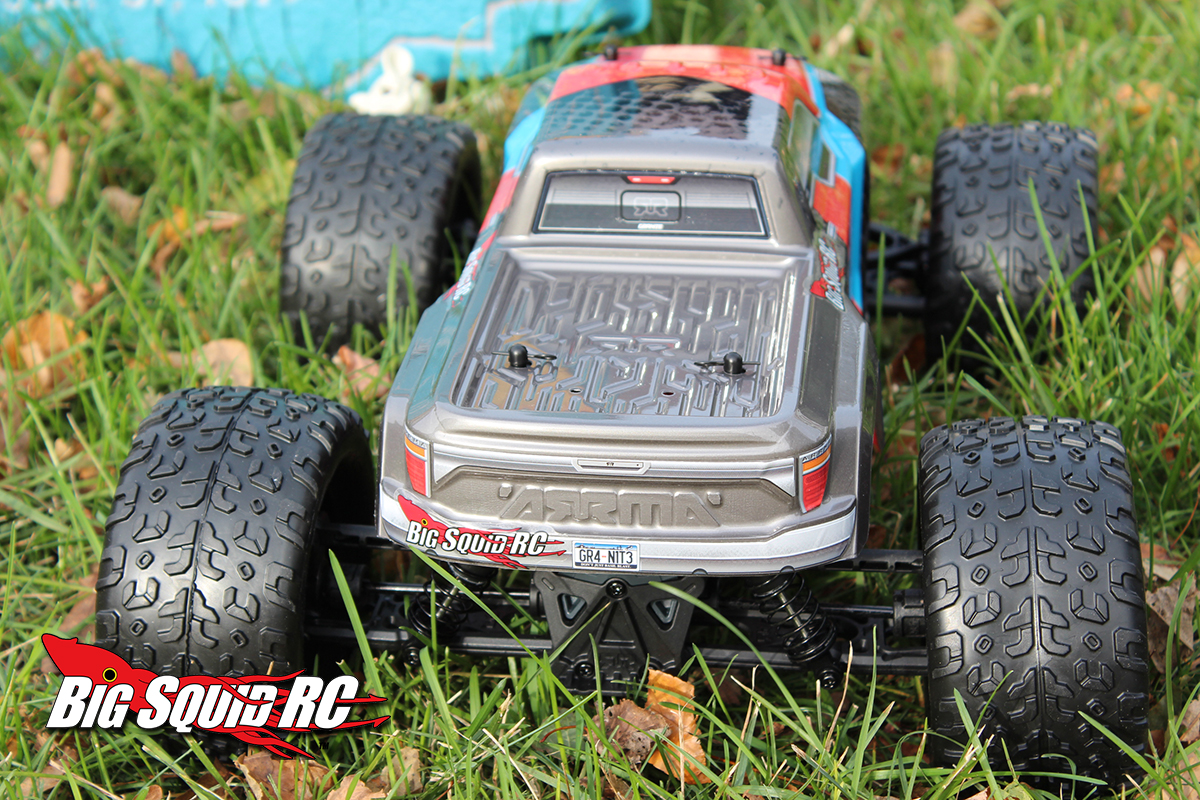
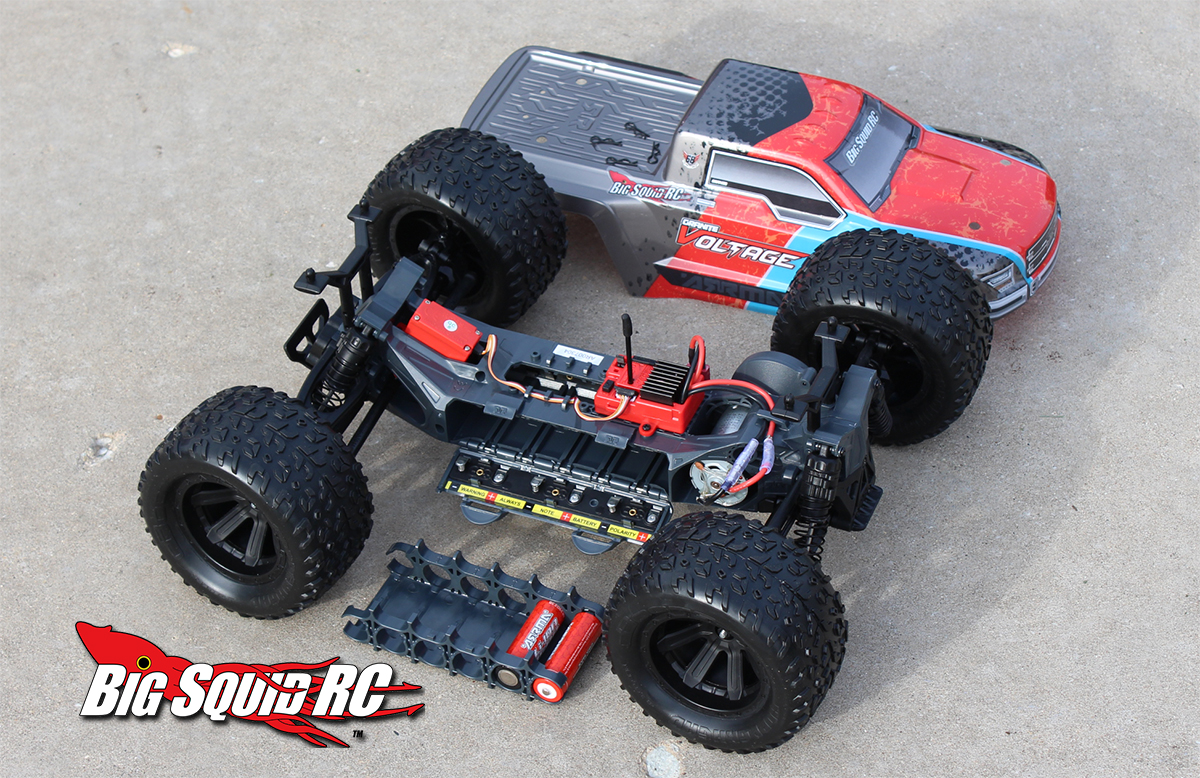
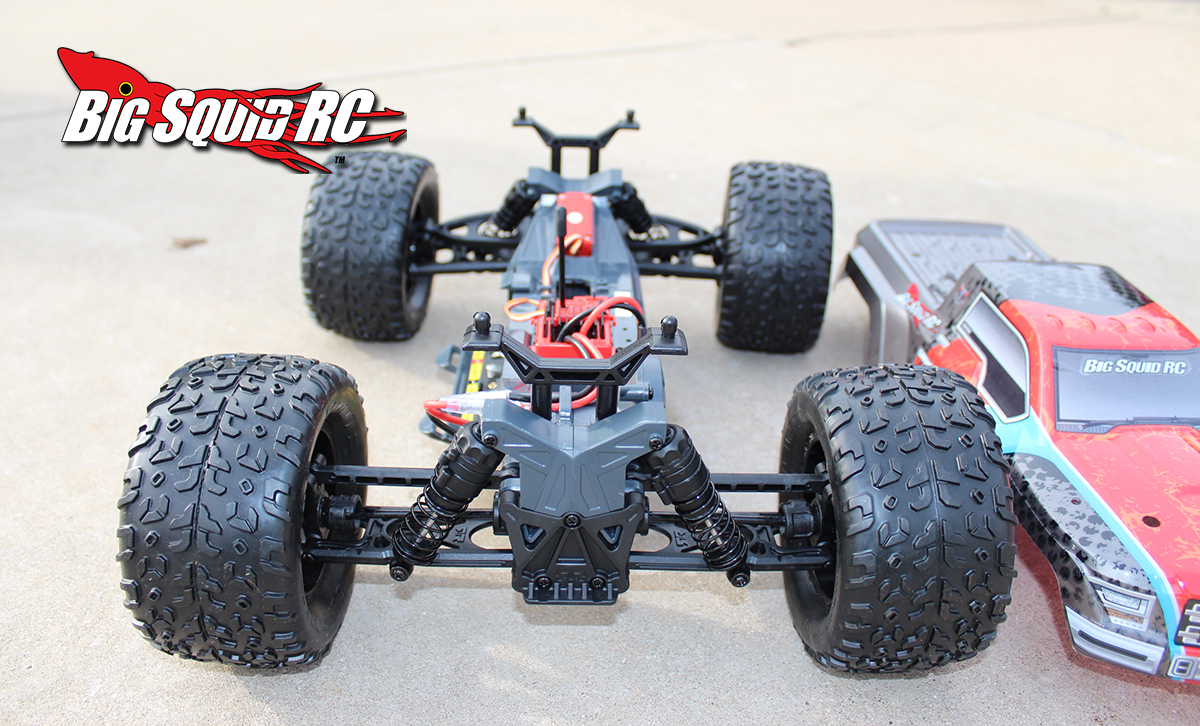
When we heard about the ARRMA Voltage Granite Mega from Horizon Hobby was getting a price drop to $99, it seemed like something we wanted to revisit. We had reviewed the ARRMA Voltage Fazon a while back, but this one is a little different. The Granite comes with Lithium Ion batteries which is something that is still very new for the hobby. Is it a good starter truck? How fast is it? Keep reading to find out.
From: ARRMA Direct Link: ARRMA Voltage Granite Mega
Review By: Brian Pics By: Brian
Specs:
RTR or Kit: RTR
Age: 14+
2wd or 4wd: 2wd
Electric or Gas: Electric
Waterproof: Yes
Scale: 1/10
Length: 418mm / 16.46″
Width: 340mm / 13.39″
Wheelbase: 285mm / 11.22″
Weight: 3.8lbs
Motor: Brushed 540, 20 turns
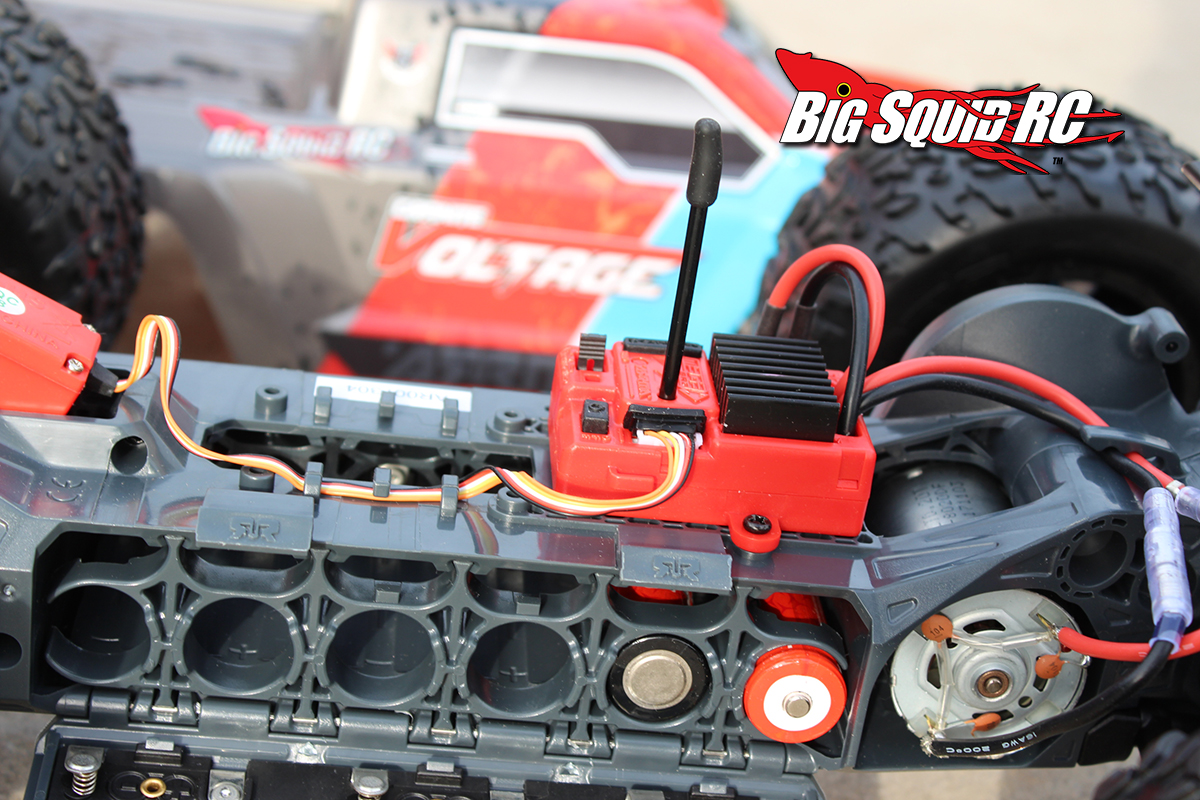
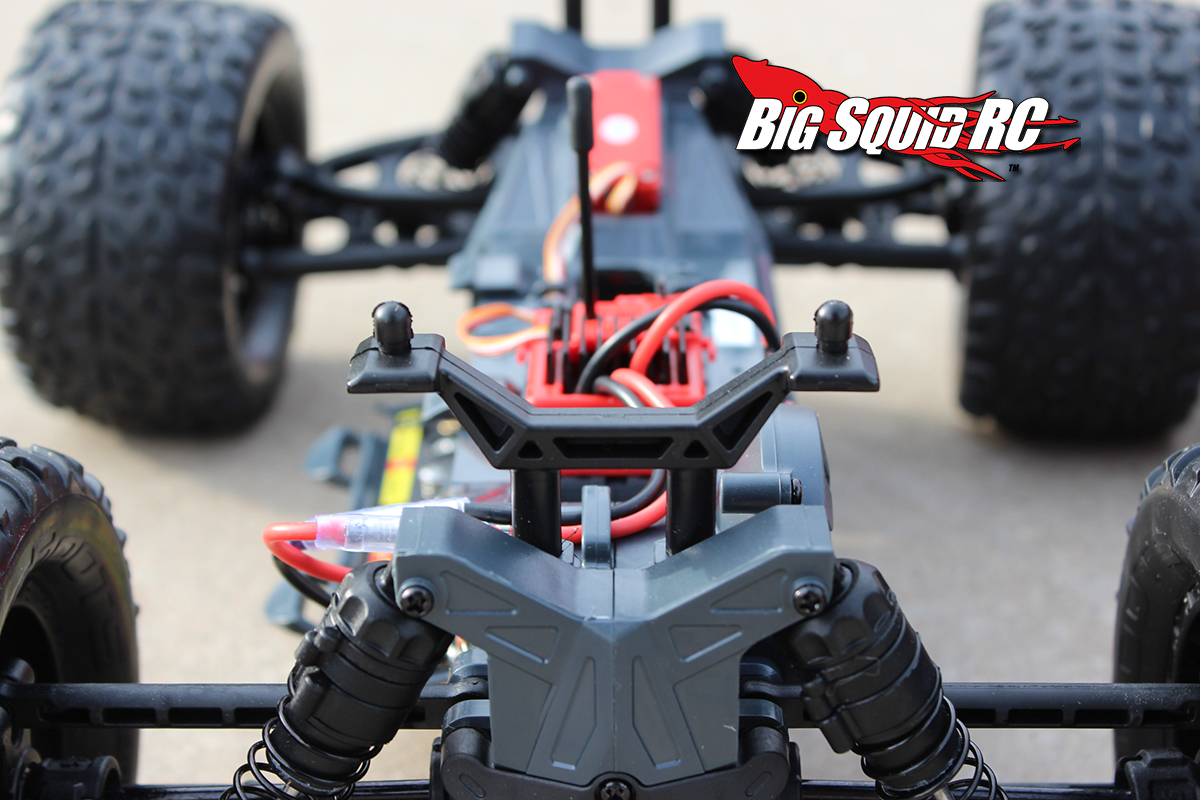
Speed Controller: ARRMA 3-in-1 SRS
Low Voltage Cut-off: Yes
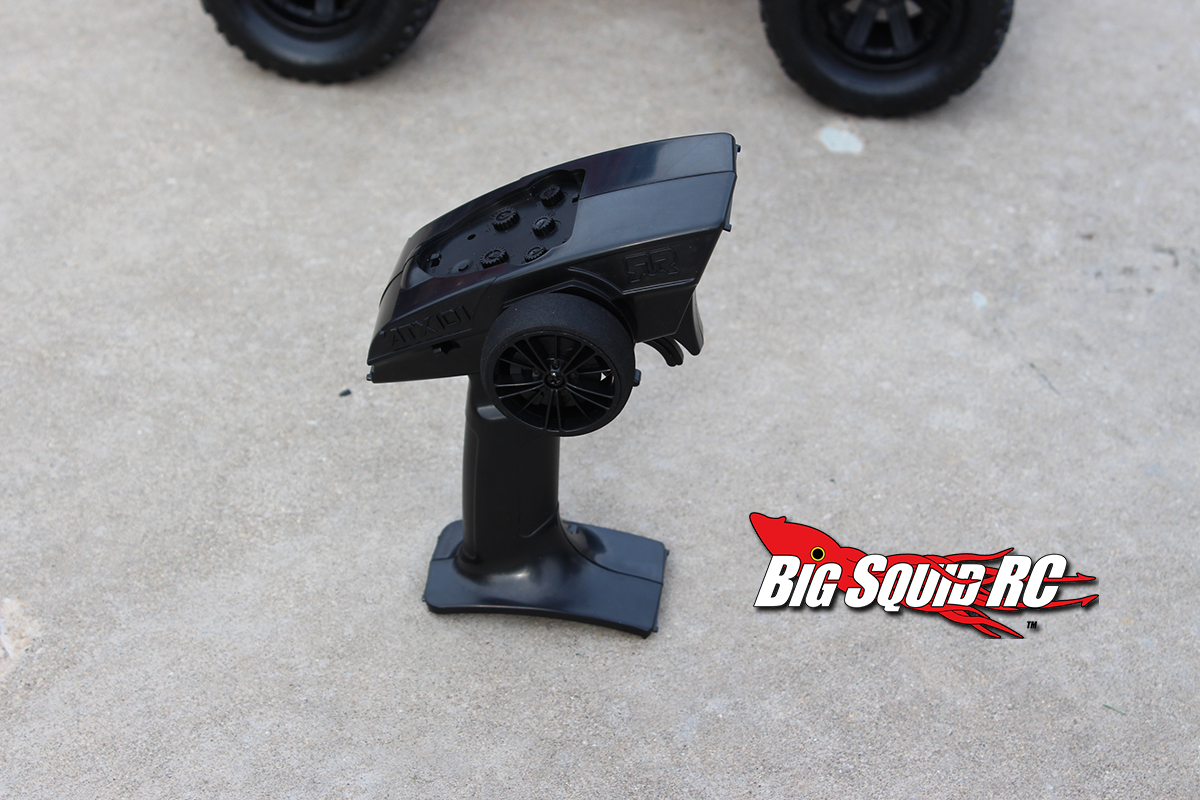
Radio: ARRMA ATX101 2.4GHz
Differential: Gear type
Driveshafts: Metal bones
Internal Gear Ratio: 2.6
Shocks: Plastic, oil filled
Servo Saver: Yes, on servo
Screws: Phillips
Spur/Pinion Pitch: 93T, 48 pitch
Bearings: Yes
Tires: dBoots Copperhead MT
Battery: Includes 2 ARRMA 18650 Lithium-Ion 1500mAh
Part Number: #AR102663
Warranty: 2 year limited
Bashing Specs:
Front wheel travel: 1.75″
Rear wheel travel: 2″
Wheelie on demand: No
Backflip off ramps: No
Stability Control: No
Sound Module: No
Self-Righting: No
FPV: No
Top Speed (measured by BSRC): 25 mph
Runtime (measured by BSRC on stock 2S 1500): 6 minutes. (20 Minutes on a 6 Lithium-Ion Batteries)
Street Price: $99
Primary Competition: We are putting the Voltage Granite in the beginner category. So direct competition are vehicles like the ECX 1/10 AMP and maybe the HPI Jumpshot MT.
What’s Needed To Complete: The Granite comes with a pair of Lithium batteries to power the truck, all you need is four AA cells for the transmitter. You will eventually want to upgrade to the full 6 LiOn batteries to get that run-time up.
Build Quality: We didn’t find any issues out of the box. We actually had two Granites and two Fazions and none of them had any problems out of the box.
Test Drivers: Wrench, Tommy, Jeremy, Mini wrench and myself.
Test Venues: For testing we hit our home town favorite Juicebox Off-Road Park, a few parking lots, streets, backyards.
Set-up Notes: We left everything stock for our testing purposes. The ride height, along with all suspension settings, were left stock. We added four MaxAmps AA cells into the transmitters, then used the stock Lithium Ion batteries to power the trucks. All charging was done with the included chargers. We did test the truck for a bit on 2 Lithium Ions, but most of the runs were done on 6.
Turning: The trucks turned surprisingly well for being $99 vehicles. We expected the servos to be under powered, but they had more than enough to get us around the tracks without a big amount of under-steer. Not once did we think we needed more steering. The tires handled well in the dirt and we even had enough power to kick out the rear end in the corners.
Jumping: The truck is well balanced, and we didn’t have any issues hitting the ramps, jumps, hills and curbs while keeping it on all 4 wheels. There was rarely a need to try and adjust in the air, it was mostly smooth sailing up there. We hit jump after jump after jump and we were never had any unexpected jumps or issues trying to land.
Bumps/Whoops: The suspension did a fine job in the rough stuff, and the light chassis made easy work for just about all the terrain we encountered. The Granite is a mid-motored setup, so no worries about landing on the motor.
On-Road: While the street isn’t what these vehicles were made for, you can still have fun out there. We didn’t notice any excessive wear to the tires from running on pavement. The Granite can traction roll so be mindful of those quick turns before your doing the walk of shame down the black.
Grass: The truck had no problem is the short grass, but you will probably want to stay out of the deep stuff.
Tires: The tires look good and did very well in the soft dirt. They held up well throughout our testing with very little wear. They tires are a bit hard, and might not be idea for the harder dirt.
Power: With a top speed of 25mph, and more than enough to create roosts in the dirt, we were overall very satisfied with the stock power setup.
Radio: Don’t let the strange look of the radio scare you. The unit is quite small, but worked fine for us. Even though the radio has a small form factor, most of our guys were just fine with its ergonomics. After a few minutes you will forget what you are even holding in your hand. It has all the adjustments that you really need the batteries seem to last a long time.
Broken Parts: Out of the 4 vehicles we bashed and beat up on, we ended up breaking one of the plastic out drives.This was after a LOT of bashing. It is a cheap part to replace, and surprisingly easy to do.
Misc Notes:
The most interesting part of the Granite Voltage are those Lithium-Ion batteries. Instead of coming with a “standard” NiMH pack, the ARRMA comes with a pair of 18650 Lithium-Ion cells (with a USB charger). The cells are 1500mAh each. Stock, you insert the two Lithium cells into the truck. At that port you are running 2S. You can run up to 6 of the Lithium cells at once. As you add more cells, no, you don’t get any more voltage as they are wired in parallel, but you do increase run-time. We measured run-time at right at 6 minuts on just 2 of the Lithium cells and over 20 on 6.
What if you don’t feel like using the supplied rc car lipo batteries pack? That’s right, you can also use “normal” packs in the Granite if you want to. A Deans connector (awesome!) comes stock.
Did we mention it’s Mid-motored? Another great feature! While putting a motor in the middle of a truck/buggy does have handling benefits, we are more excited that the motor on the Granite is tucked safely out of harms way for durability reasons.
For $99, it would be difficult to come up with another vehicle you could have so much fun with. It’s a great beginner truck with the safety of the LI-ION batteries and charger while still getting you some great speed.
The Big Squid RC crew spent the day at Jeremy’s Juicebox Off-road Park on the dirt oval track and had a blast. We seriously had a great day of bashing with the trucks. They were fast enough to force you to pay attention to what you were doing, and tough enough that nobody broke anything during our demo derby which included launching the trucks towards each other at full speed off the ramps. (Watch for that video coming soon!) We then beat the trucks up in the parking lot as well as at the Rocky Mountain Hobby Expo on the big metal moto ramps!
If you have someone in your life you’d like to help get into RC, the ARRMA Voltage vehicles are a great jump in vehicle. You can find them on Tower Hobbies, Horizon Hobby, and even Amazon! Time to pick up some of the Christmas gifts.
Best Mod: Probably some Duratrax Six Pack MT Tires.
Summary:
A = Outstanding/Best in Class, B = Above Average, C = Average, D = Below Average, F = Horrific
Time To Bash: B The Granite comes RTR, add 4 batteries to the transmitter, put in your charged battery pack and you are rolling. If you are using the Li-Ion batteries, you are going to be waiting a while as charging them can be pretty slow with the included charger. The truck comes with 2 Li-Ion batteries but you’ll need 6 if you want to run more than a few minutes.
Workability: B We would much rather see hex hardware but the Phillips hardware held up ok and we were able to wrench without issues.
Car Show Rating: B+ Many of the crew were impressed with some of the details and look of the Granite body. For the price point, it’s a good looking vehicle.
Bash-A-Bility: B+ We were able to beat up on the trucks pretty hard. We had 4 vehicles for testing, but at the end of the day, we did loose one rear diff and eventually a outdrive. That being said, it’s amazing no other parts were broken after numerous on-purpose full speed head on collisions.
Fun Factor: A WWe had a blast bashing the ARRMA Granite Voltages. This might be one of those times where things are more fun in pairs. We kept going back to the vehicles and coming up with other crazy stunts to try and break them.
Handling: C Overall the truck handled quite well. The traction from the tires was good enough.
Value: A At $99 it’s tough to come up with a more fun vehicle at that price that can take a good bashing and bring a smile to even a seasoned rc’er.
Parts Availability: B You aren’t going to find the parts on the pegs of hobby shops after December, the Voltage series is online only, but everything is available on the net, and for reasonable prices for most parts. (Check Amazon, Horizon or Tower)
BigSquid Rating: B+ The whole crew was impressed with the ARRMA Granite Voltage. If you are in need of a Christmas gift, or are just looking to get someone into the RC hobby, the Granite would be an excellent start.
Winter is coming now, do you ready to eat fly indoor Tiny whoop? Here is an overview of some of the best Tiny Whoops we have right now in the market. When talking about Tiny Whoops we generally mean those tiny little FPV drones that have ducts around the propellers. They are tons of fun to fly in the house especially on rainy days and winter.
The Types of Tiny Whoop
There are two major categories in tiny whoops.
Brushed or Brushless
“Brushed” and “Brushless” are the types of motors used in a quadcopter. As an over-simplified summary:
Brushless motors = power, speed and longevity
Brushed motor = cheap, simplicity and lightweight
Originally, Tiny Whoops were all using brushed motors. They were popular because of how easy they are to use. They only have 2 wires as opposed to the 3 wires on brushless motors. Brushless motors require dedicated ESC (speed controllers) to make them work.
Brushed motors are known to have a shorter lifespan but they are cheap to replace, while brushless motors are more expensive but can last much longer if handled properly.
Brushless motors recently became popular in tiny whoops and seem to be taking over brushed motors. They are more powerful and battery hungry, new options even support higher voltage for extra power.
1S vs. 2S
“1S” and “2S” are the number of cells in a battery. A 1S battery has a nominal voltage of 3.7V while that of a 2S battery is 7.4V.
1S is the classic choice in Tiny Whoops and it’s still more popular. 2S is catching up, and I really think 2S (or even higher voltages) is the future as it says a lot less than 1S towards the end of the battery. 2S is faster and can just be as effective if used with the right motors and propellers.
2S Whoops are more pricey than 1S at the moment due to the higher spec components. so if all you want to do is casual indoor FPV flying, 1S is totally fine! (and the power is more manageable too)
1S Tiny Whoop
The latest and greatest whoops are mostly brushless. Here is a spec comparison between three of my favorite 1S models at the time of writing.
UR65
US65/UK65
SNapper7
Price
$84
$75
$77
Motor
0603 17000KV
0603 19000KV
0802 17000KV
Props Size
31mm
31mm
40mm
Weight (no bat)
20g
22g
28g
FC Firmware
Betaflight
Betaflight
Betaflight
Built-in RX
Frsky
Flysky DSMX
Frsky
Flysky
Frsky
Flysky DSMX
OSD
Yes
Yes
Yes
VTX
25mW
25mW
25mW
SmartAudio
No
Yes
No
Current Meter
Yes
Yes
Yes
Connector
PH2.0
PH2.0
PH2.0
Buzzer
No
No
No
UR65
It’s very lightweight, the lighter the whoop, the less likely you may damage stuff in crashes. The UR65 was probably the hottest whoop during mid-2018. It’s affordable and spare parts are less expensive and widely available.
It also comes with an awesome parallel charging board. It allows you to charge up to 6 batteries at the same time. This is going to cut your waiting time considerably!
US65/UK65
Despite the different branding, the US65 and UK65 are believed to be the upgraded UR65 because of the similarities. Apart from the more colorful canopies, the motors have been upgraded to 19000KV motors from 17000KV. They’ve also added SmartAudio to the video transmitter so you can change channel through Betaflight OSD or LUA script, pretty awesome huh?!
But surprisingly, the US65/UK65 are few dollars cheaper, making it a better option in value if you don’t mind the flags. Compared to the UR65, you might or might not notice the increase in power because the UK65/US65 are a couple of grams heavier. This is due to the possibly different frame material which feels a lot stiffer than the UR65’s.
There is rumor that the UR65 and Snapper 6 are made in the same factory because they come in the same design, package as well as instruction manual. But the Snapper 6 uses heavier frame material which results in over 3g weight difference, that’s why we recommend the UR65/UK65/US65 over the Snapper 6. Three grams makes a huge difference to flight performance and flight time when it comes to a tiny whoop sized aircraft! And this battery is fit for you, check Tiny whoop battery
SNapper 7
The frame of the Snapper 7 is made of aluminum and carbon fiber, so you can expect it to withstand harder crashes. If you don’t trust plastic frames and want a more solid solution, this is the one you want to get. However, the downside with metal frame is, if you crash really, really hard, the frame can be bent out of shape and obstructs your props. The Snapper 7 is the bigger version of the Snapper 6, (and the UR65 if you believe they are made by the same people). The differences are in the beefier motors, and it’s using bigger propellers (40mm vs. 31mm), resulting in more powerful and efficient.
AcroBee by NewBeeDrone
The AcroBee is a classic 65mm Tiny Whoop equipped with 0620 brushed motors. This is the model I’d recommend if you are looking for a brushed Tiny Whoop. It flies super well, and easy to configure as it’s running Betaflight. Great for indoor flying, it’s quiet and gives long flight time.
2S Tiny Whoop
If you are looking for more speed, and racing in places with more room, 2S is the way to go. Here are some of the most popular 2S Whoop currently:
Mobula7
Beta65X
Beta75X
Price
$96
$140
$150
Motor
0802 16000KV
0802 17500KV
1103 11000KV
Props Size
40mm
31mm
40mm
Weight (no bat)
25.9g
26g
41g
FC Firmware
Betaflight
Betaflight
Betaflight
Built-in RX
Frsky
Flysky
DSMX
Frsky
Flysky
DSMX
Futaba
Frsky
Flysky
DSMX
Futaba
OSD
Yes
Yes
Yes
VTX
25mW
25mW/200mW
25mW/200mW
SmartAudio
Yes
Yes
Yes
Current Meter
Yes
No
No
Battery Connector
2x PH2.0
2x PH2.0
XT30
Buzzer
Yes
No
No
Mobula7
Still too much power? You can consider limiting your throttle in your Taranis. You can do this in the Mixer page in Taranis, reduce the weight of throttle from 100 to 75 or 50, and adjust the Offset so the range starts at -100. Either you are into racing, or just general flying you will find the Modula7 more manageable compared to some other options in its class. It’s far easier to change the camera tilt angle in this model. Battery fit for you here.
However please note that the frame seems to be less durable compared to the Beta 65X or 75X.
Beta 65X
The Beta65X has the exact same size as traditional 1S 65mm whoop, but powered by 2S batteries!. Comparing to 1S whoops, some might find them harder to fly indoor especially in tight spaces due to the higher voltage and camera angle. They would be perfect for garden or park flying though! The battery for this type: 220mah 1s. with Jst ph 2.0 plug
The Beta 75X is the bigger brother of the 65X and it’s a beast! I’d say this is designed more for long range and outdoor. For indoor you probably need a really big house 🙂
Which is the Best Tiny Whoop?
I’d pick the US65 or UK65 as the best whoop for value if you are just looking for the smallest FPV drone to fly in your living room. It’s not too powerful, and it’s so light it’s will hold up well to crashes.
For something faster than you can fly both indoor and outdoor, definitely consider the Mobula7. It’s 2S brushless, so it will have more power and potential than all the 1S whoops. Is it too powerful for indoor? Not necessarily as you could easily adjust the camera angle, or even limit your throttle in the Taranis if you want to reduce the power.
For flying outdoor and racing, I’d probably get the Beta75X. It will handle the wind better than the Mobula7.
Building Your Own Tiny Whoop?
The whole tiny whoop craze started by adding your own camera and video transmitter to tiny toy quadcopters. I had a tutorial teaching people how to build a tiny whoop from scratch.
You no longer have to build it by yourself. You can buy a tiny whoop straight off the shelf and it includes literally everything you need: the quad, camera, VTX, batteries, and charger. Just bind it to your radio transmitter and you are ready to fly! They fly straight out of the box, and they are also cheaper!
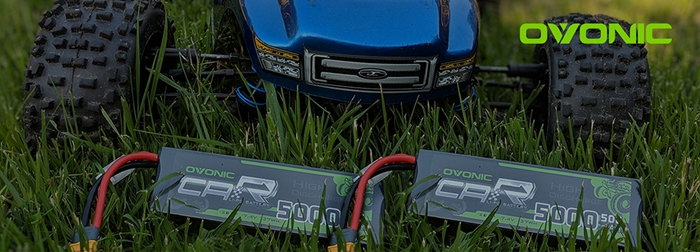
This is the new OVONIC 2S Lipo battery 5000mAh 50C from Ampow. The battery features a hard case design with a 12-gauge pre-wired Deans (T-style) connector and JST-XH balance charge connector. It is rated with a 50C discharge and 100C max burst discharge rate. The battery is a standard “stick pack” with dimensions of 137mm x 45mm x 24mm and weighs in at 302 grams.
This OVONIC pack is ideal 1/10-scale off-road vehicles which use a full-length battery pack (such as short course trucks, monster trucks, and rock crawlers).
This 5000mah lipo battery pack provided ample run-time in our Traxxas 2wd Slash with a modified motor and remains well balanced and consistent charge after charge.
Specifications (provided by Ampow):
Brand: Ovonic
Chemistry: Li-polymer
Cells Number: 2S
Voltage(V): 7.4V
Capacity(mAh): 5000mAh
Discharge: 50C
Max Burst Discharge Rate (C): 100C
Charge Plug: JST-XH
Discharge Plug: Deans Plug
Battery Weight(dev.20g): 302g
Battery Dimension: 137x45x24mm
Wire Gauge: AWG12#
Wire Length(mm): 115mm
Pros:
Very reasonably priced at only $24.99.
Plug and play with pre-wired connectors.
Clear shrink-wrapped hard case design.
Fits most 1/10-scale short course trucks, monster trucks, and rock crawlers.
Cons:
Balance plug has a bulky protection clip that can make placement in the car difficult without removing it.
Final Word:
While this is not our first pick for serious competition, this battery pack works great for someone who is looking to go backyard bashing, upgrade from a NiMh battery pack, and/or looking for a budget-friendly LiPo battery pack.
The durable and powerful RC truck and SUV is becoming a thing, thanks to Traxxas. With their 1/10 scale model of Maxim fave Land Rover Defender they’ve doubled down on owning this niche in remote controlled vehicles in a big way.
The RC car of the past was mostly confined to the driveway and—at best—the street when traffic was light. But just like its full-sized counterpart, this Traxxas TRX-4 Scale and Trail Crawler can handle damn near anything.
The machine’s off-roading abilities are due to portal axles that provide excellent height, eliminating the need to sidestep plenty of outdoor obstacles. It also has a high-low transmission that adds a range of ability rarely found in many other RC vehicles.
Any RC fan is going to wonder about the TRX-4’s ability to handle water. Its high torque metal-gear 2075 servo and XL-5 HV speed control along with the radio receiver are completely shielded by special Traxxas-developed waterproofing.
On first look, these photos fooled us for a moment into thinking we were looking at a full-sized Land Rover Defender. That’s because the scale-modeling is so precise. Land Rover allowed Traxxas to license the Defender body, so you’re looking at a fully functional spare tire on the rear, realistic grille and bumpers as well as lights—and a jack is even thrown in for good measure.
You can check out an RC hobbyist review in the video below.


 With the tail all situated, the main wing is all that’s left to finish the build. I found it easiest to assemble the wing and hold it in place with the bracket and screws, placing it on the fuse just aft of the opening on top and joined up the wires. The LED’s in both the wings and the receiver Y-harness are labeled either L1 or L2, but the aileron and flap leads are only labeled on the wing sides. Common sense (with Spektrum receivers) dictates that the Y-harness on channel 5 is for the flaps while the other is for aileron. Once all connected, bind the model to your transmitter using one of the prescribed methods in the manual (1: bind plug in, power model on, remove plug and bind model for AS3X and SAFE or 2: place bind plug, power model on, bind model, then remove plug for AS3X only). If using SAFE, you must program whichever switch you want to activate the different flight modes. Once bound, power the transmitter on, then the model back on. Once initialized, pull both sticks down and in and hold them there while toggling the desired switch back and forth at least five times. After that, it’s as simple as stuffing the bundle back down into the fuse while placing the wing. It would be nice if there was some sort of shroud over the elevator and rudder servos to prevent any wires interfering with them, but shoving the veritable bird’s nest of wires as far forward when attaching the wing.
 IN THE AIR

 One the water, with a mild breeze, the Timber is a joy to taxi. Being sure to keep on the elevator, the dual rudders have awesome turning power, so you won’t be trekking to retrieve your model if the wind picks up and it weathervanes. Being cautious, yet deliberate on the tail sections and with the flaps at mid, I advanced the throttle and watched the Timber climb up on step in just a few feet, just like on land. I pushed it a little harder and watched the model climb out in glorious amphibious fashion. Handling in the air was much the same as with the wheels on it, only a bit slower with the rolls and loops. If you can believe it, hovering was actually easier for me with the floats on, though I still kept it up a bit. Touching down on floats is always a nerve racking experience for me, but just as with the maiden, I lined it up and basically let the model do the rest. With limited chop on the water, I kept the tips just above parallel at ¼ throttle and waited for contact. Once the water touched, it did grab just a hint so a slight jab of up elevator and easing slowly off the throttle once settled makes the Timber about as easy as any float plain to land. I un-puckered and took back off for another series of worry-free touch and go’s aqua style.
 THE LAST WORD